Unifi CloudKey Gen2 Plus Dual Homing
UPDATE: Updates to the Unifi software now conflict with this configuration. I highly recommend finding an alternative solution as this will cause the Unifi Protect software server to fail in subtle ways.
This is a guide for dual-homing a CKV2P this is currently operating in a configuration where the device operates in a single subnet for both Unifi Network Controller and Unifi Protect Controller.
Overview
The Ubiquiti Unifi CloudKey Gen2 Plus (CKV2P) is a piece of hardware designed to act as both the Unifi Network Controller and Unifi Protect Controller in a Unifi environment. When I purchased the CKV2P, it was the only supported hardware for a Unifi Protect installation, and I don’t want to purchase a second CKV2P just for the sake of firewall configuration. Ubiquiti has Unifi Protect NVR hardware in beta according to their changelogs, but I don’t know the timeline for that.
I’m a bit of a firewall nut, I have my network very compartmented in regards to vlans and strictly control traffic in, out, and between the vlans. I wanted my cameras to be on their own VLAN with very strict control about what can access them and what they can access. This is the easy part. (Hit me up on Twitter) if you would like a complete guide, this one is only about dual-homing.)
I could have put all my cameras in one vlan, my controller in another, and only allowed select traffic between them. Security managed. Performance… not managed.
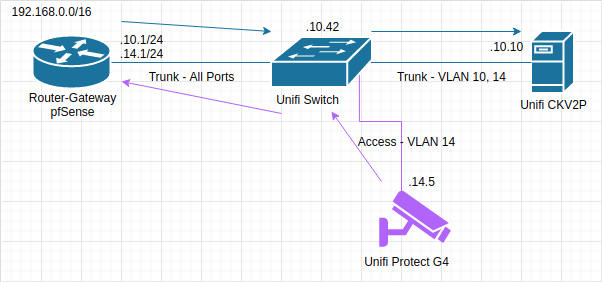
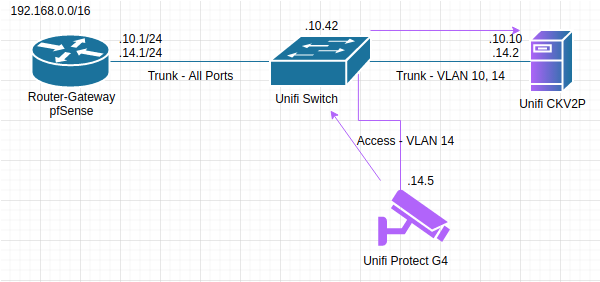
See, even though the CKV2P was on a trunk link tagged for both the controller vlan and the camera vlan, the switch only handles forwarding frames, not routing. The CKV2P wouldn’t know what to do with a frame in the camera vlan, and the switch wouldn’t forward it because there isn’t a host down that link in its MAC table. To move between the vlans, the packets had to traverse the switch (twice!) and the router. Given the amount of data that 4K cameras can generate, that’s completely unacceptable.
Time to dual-home the controller device.
Configuration Procedure
Again, this only covers the dual-homing, not the configuration of DHCP, firewall rules, or the Unifi switch. I’d be happy to put something together in the future if there is interest.
This guide is close to what I did, but if you are implementing it yourself, you will want to adjust the addresses, servers, and maybe even vlan numbering to your own needs. This is just a template.
For the sake of the guide, we’ll use two vlans:
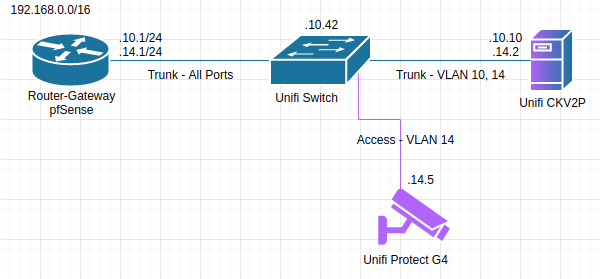
VLAN 10: Network Management- Gateway:
192.168.10.1/24 - CKV2P:
192.168.10.10
- Gateway:
VLAN 14: Security Cameras- Gateway:
192.168.14.1/24 - CKV2P:
192.168.14.2
- Gateway:
We’ll first need to SSH into our CKV2P device. The reference the official guidance if you’re having trouble getting in.
Once we’re in, we’ll navigate to the network configuration directory provided by systemd. Despite being built on Debian 9.12, the CKV2P uses systemd network configuration. We’ll then configure our trunk link for our two vlans.
File: /etc/systemd/network/eth0.network
[Match]
Name=eth0

[Network]
DHCP=yes
VLAN=eth0.10
VLAN=eth0.14
We’ll be moving the “Fallback” section elsewhere, so feel free to scrap that.
Next, let’s configure the virtual interfaces that our vlans will use. These files do not exist, so you will need to make them.
File: /etc/systemd/network/eth0.10.netdev
[NetDev]
Name=eth0.10
Kind=vlan

[VLAN]
Id=10
File: /etc/systemd/network/eth0.14.netdev
[NetDev]
Name=eth0.14
Kind=vlan

[VLAN]
Id=14
Then, we’ll set the network configuration of the new virtual interfaces. Again, these files will not exist before you make them.
File: /etc/systemd/network/eth0.10.network
[Match]
Name=eth0.10

[Network]
DHCP=yes
DNS=192.168.10.1

[Fallback]
Address=192.168.10.10
Netmask=255.255.255.0

[Route]
Gateway=192.168.10.1
Table=10

[RoutingPolicyRule]
From=192.168.10.0/24
Table=10
File: /etc/systemd/network/eth0.14.network
[Match]
Name=eth0.14

[Network]
DHCP=yes
DNS=192.168.14.1

[Fallback]
Address=192.168.14.2
Netmask=255.255.255.0

[Route]
Gateway=192.168.14.1
Table=14

[RoutingPolicyRule]
From=192.168.14.0/24
Table=14
Most of these options are fairly common. The Table option tells the system to create and use a new routing table for each interface, since you don’t want the traffic to and from your virtual interfaces using the same routing table.
Next, you’ll want to set the system address that the network controller uses to communicate with other Unifi network transport devices. In /srv/unifi/data/system.properties add a line anywhere in the bottom section containing: system_ip=192.168.10.10 or your equivalent controller address from earlier. Unifi Protect does not have an equivalent setting as far as I can tell.
Lastly, reboot using the web-gui (just to make sure it goes through a full approved shutdown).
Congrats! Your device is now configured for dual-homing.
Concerns
There’s three main concerns with this method that I’ve found.
Concern 1 - Security Footprint
While this setup does massively improve performance, it also exposes the network controller to the cameras because the firewall is never hit. This is easily mitigated using the CKV2P host firewall, but this is not covered here.
Concern 2 - TCP RSTs
The cameras generate TCP RSTs to controller device on configuration port.
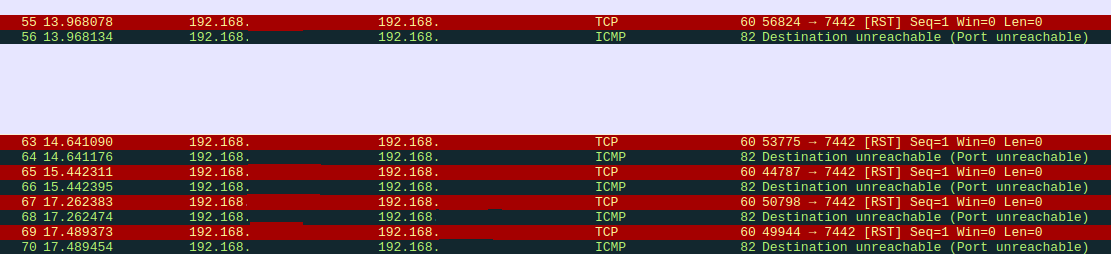
The cameras try to contact the protect controller on TCP/7442 and fail. This doesn’t prevent configuration changes, those still work fine. I’ve not found any side-effects of this yet, but it’s a bit sad to look at. Hopefully someday there will be an option to bind the protect controller to a sprecific address. It’s likely this could be fixed by unmanaging the cameras and re-adopting them. Without doing that the system still works because the switch will forward the frames down the correct link and the controller will handle it using the other address.
Concern 3 - Wonky Web-GUI
The image speaks for itself. The system isn’t built for this config, so it may act up slightly. I recommend not making changes via the webgui to the network config or it may try to reset your configuration in unexpected ways.
